This part mainly covers the making and fitting of the compost tube and the completion of the grow pockets.
I started out by marking out the hole in the bottom of the barrel to accept the compost tube. I am going to try a completely different way of doing this. Normally people glue a fitting to the bottom end of the compost tube that takes a screw cap or some other way of closing off the compost tube. I didnt want to buy any more materials than I needed to so expensive fittings were out of the question. After seeing how the blue plastic of the barrel behaves once it had been heated I decided to mark out and cut a hole that was about 15mm smaller than the radius of the pipe. I would then heat around the hole to make it soft enough to force the compost tube through the bottom of the barrel. This would also form a flange though which I could pop rivet the compost tube fixing it to the barrel. I wanted to cut the hole in the bottom of the barrel before finishing the grow pockets because I thought I may be able to access the lower pockets through the hole but it wasnt really big enough. No harm done.
Here is the hole marked out
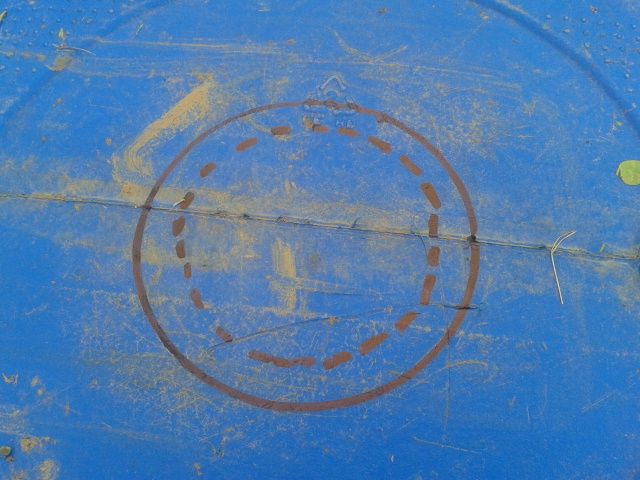
And then I cut the hole.

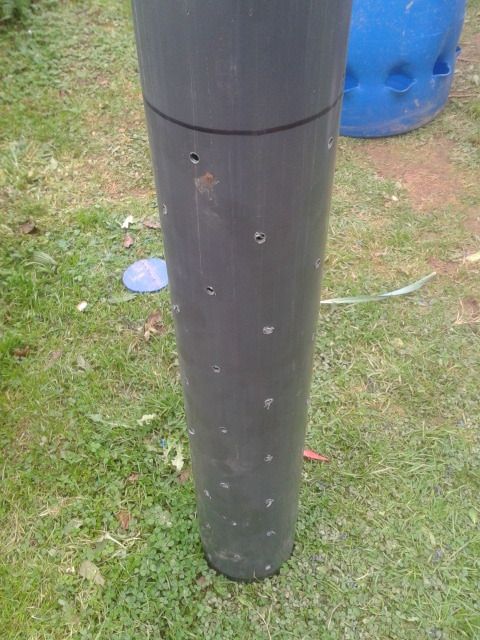
Next I went back to forming the grow pockets. This is a bit of a laborious job and the bottom two rows involves leaning into the barrel whilst heating the plastic with a blowtorch. This is not a pleasant job and in future I will use a heat gun to heat the plastic from the outside but I wanted to do this one using no electricity. I did a row of ten and then took a break to make the compost tube. I cut the tube to 1000mm. This is long enough so that the botom of the tube is flush with the bottom of the barrel and the top is about 100mm above the soil surface when the barrel is filled.
I marked a line 100mm from the top and another about 50mm from the bottom. In between these two lines I will drill holes to allow water to flush through the compost tube and let the worms travel between the compost and the soil.
This is the finished compost tube.
Here is a picture down through the pipe. Just because it looks funky.

Once I finished forming all the grow pockets I heated up the area around the hole to allow the compost tube to enter the barrel. This took ages and in the end I had to slit the hole all the way round to get the tube in. It still worked OK but it was not perfect. I didnt get any pictures of me fitting the tube as there was a lot going on and I only have two hands.
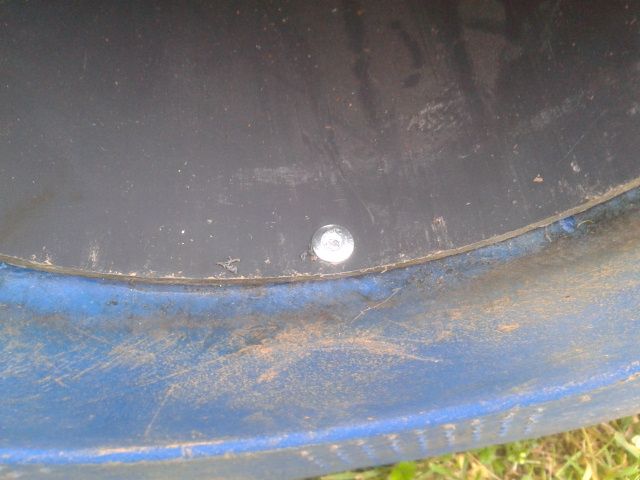
Here is a picture of it fitted.

I then drilled through the tube and the flange inside the barrel and fixed the tube to the barrel with pop rivets.
Here is a picture of the barrel so far with all the grow pockets formed and the compost tube fitted.

The next job was to make some way of closing off the bottom of the compost tube that can easily be opened to remove the compost once it is done. Normally people have some sort of screw cap or compression bung. I dont like either of these ideas for a couple of reasons including the cost and the fact that you will have to scrabble around under the barrel trying to screw the bung back into a filthy tube with gunged up threads etc.
I wanted to make something that was free and also easy to use and this is what I came up with.
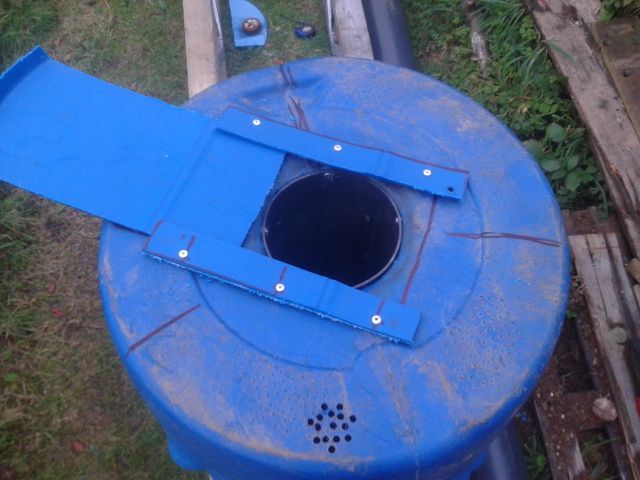
I used the top of the barrel I cut off in part one to construct a sliding Gate Valve. It worked really well because the the top of the barrel had a kind of curved lip which formed the handle of the sliding part of the valve.
I cut strips of the lid material to form the sliders and riveted them to the bottom of the barrel
This is a picture of the valve closed
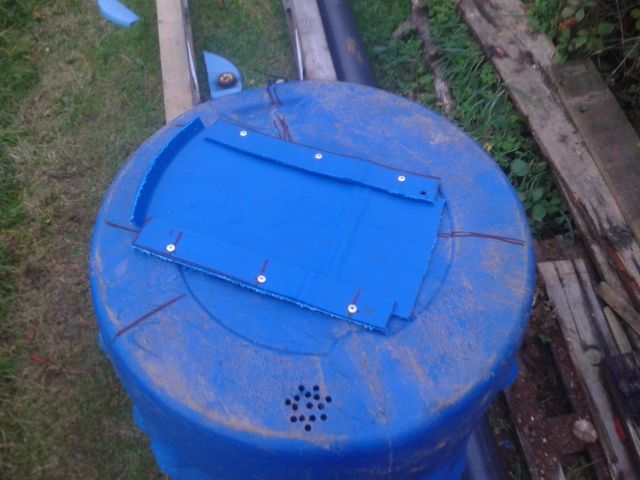
And this is it open
So that is it so far. I just need to fit the legs and fill the barrel with soil. Then I can start putting kitchen waste and worms into the composting tube and plant it up.
More soon
paul


 Similar Topics
