Sorry it's been a long time coming but I wanted to include some photos for ease of description and my camera has been playing up. In fact I 've just bought a new one though I took the ones in the post with the old canon in it's working moments!
I was hoping to finish teh description in this post but as it's so long I'll cover final wiring and testing in section 6 in a further post.
Part 4 (a)
Pop hole openerIn this part were going to cover fitting the aerial actuator and pulley system to the house which is going to need some basic woodworking skills, sawing and drilling. Im going to describe how to fit this to a small ark type house like the Forsham Lenham. It can be fitted to any house with a vertically dropping pophole though you may need to adapt the design to suit. If you have a shed type of house without a vertical pophole you can buy a ready made door assembly on ebay
(
http://stores.ebay.co.uk/Aardvark-joinery or
http://cgi.ebay.co.uk/Poultry-house-door-pop-hole-sliding-let-hatching-eggs-/260682765212?pt=UK_Pet_Supplies_Poultry&hash=item3cb1e7539care two such) which is easy to fit but here Ill just describe fitting it to a Lenham and add a few ideas in my final post about dealing with adapting it to other house designs.
In order to work safely and effectively it will be best to have some way of clamping the work pieces such as a bench and vice or a portable vice or if not available a G clamp.
The tools you are going to need are an electric drill (battery operated preferably) with a 3mm drill bit and a 22mm and 32mm flat bit. A Tenon or small cross saw , a no 2 pozidrive screw driver, a pair of bull nosed pliers and a pair of mole grips would be useful too. Were going to need some screws of various lengths depending on the wood sections well be using but probably 25mm 8guage, 35mm 10 guage, 70mm 10guage would be a good selection. A screw eyelet for fixing the cord to the door and a small spring washer and split ring for fixing the cord to the antenna. The parts we will have to make are a clamp to hold the aerial, a couple of supports for the waste pipe.
Before you start you need to ensure the door drops freely under gravity without sticking. If not you will need to remove it by unscrewing the runner guides and trimming the guides and door edges on which the door runs so that it runs smoothly. If the door is wet, dry it first and give it a coat of water repellent paint such as Cuprinol Timbercare preservative. Rub the running edges with a wax candle before refitting it to reduce friction.
Aerial ClampThe aerial is fitted to the rear wall (opposite end to the pophole) and the antenna extends in the 32mm tube which runs under the roof ridge.
The aerial is held by a clamp we will make.
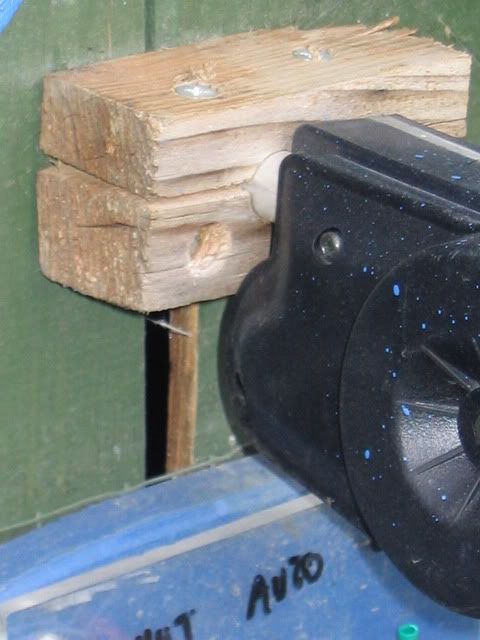
To make the clamp we will need a block of wood of approx 100mm square by a 50 70mm thick. The diameter of the aerial tube I used was 22mm so assuming yours is the same, drill a 22mm diameter hole through the wood as accurately at right angles as possible, as shown in the below diagram. Saw through the hole to form a two piece clamp. Drill two clearance holes in the body of the clamp for fixing it to the house wall and drill two clearance holes in the top part of the clamp to take the two clamping screws, as shown.
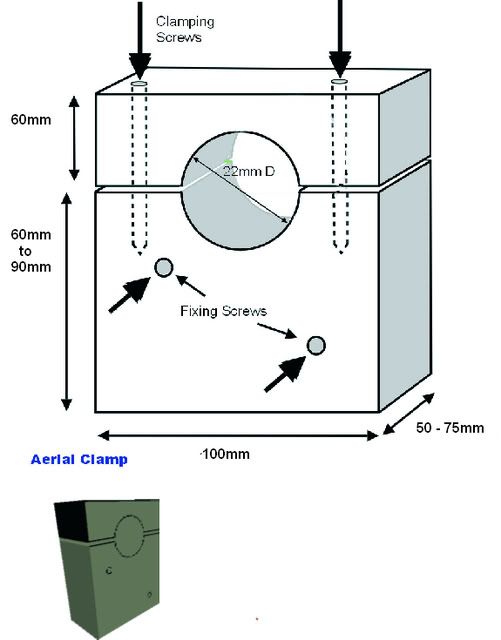
clamp diagram
Heres an alternative clamp you may find easier to make as theres very little woodwork to do. A block of wood with the metal strap usually provided with the aerial formed round a round metal tube (such as a copper water pipe) as a former. Dont use the aerial tube itself as a former as its aluminium and easily deformed. Put a rubber cushion such as a small section of bicycle inner tube round the aerial tube to protect it in both designs.
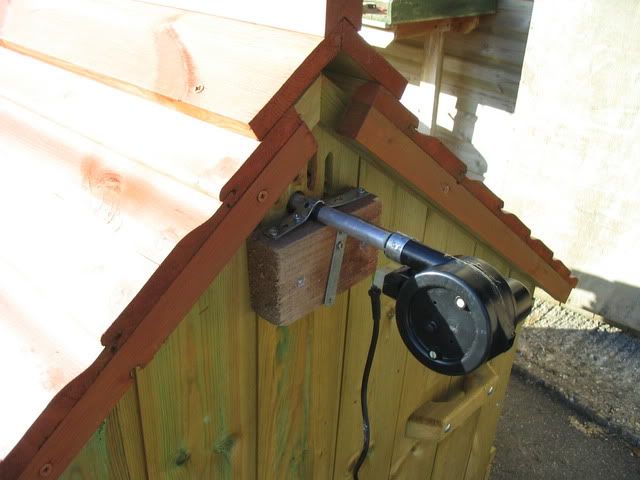
alternative clamp
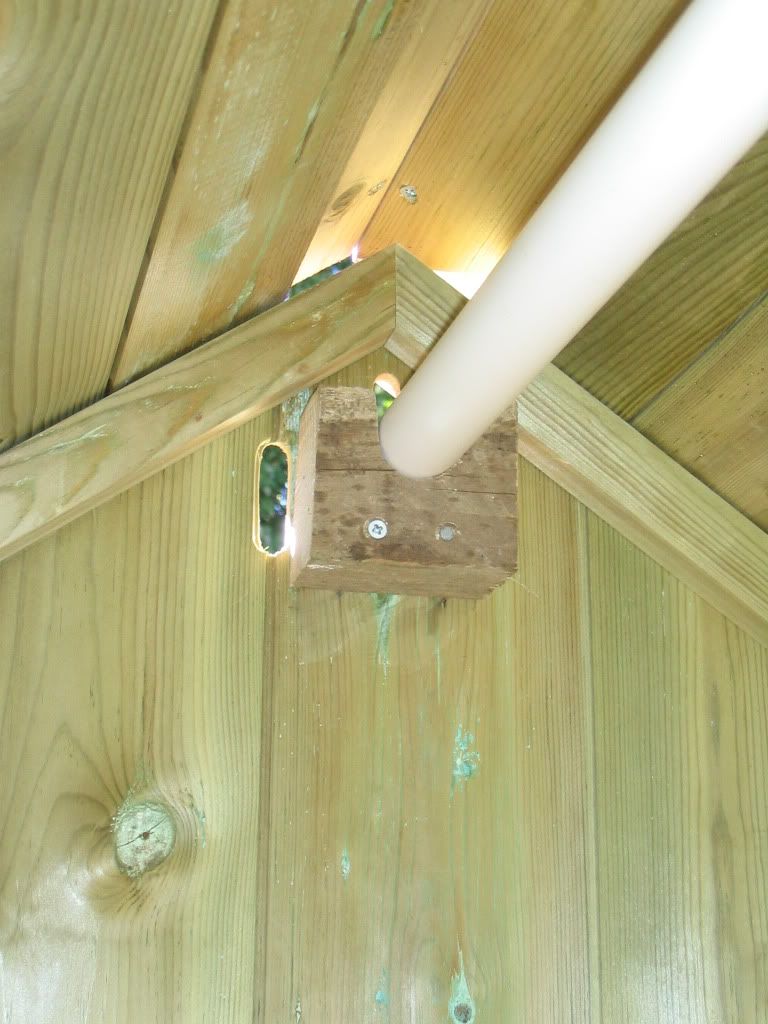
Aerial Support Tube fixingThe antenna will extend inside the plastic waste pipe which is fixed under the roof eaves inside the house. It will be supported by resting on two support brackets also made from a small block of wood as shown below. Note the notch cut in the bracket needs to be a snug fit for the pipe outer diameter (marked as 35mm on the diagram but adjust to suit the pipe you have)
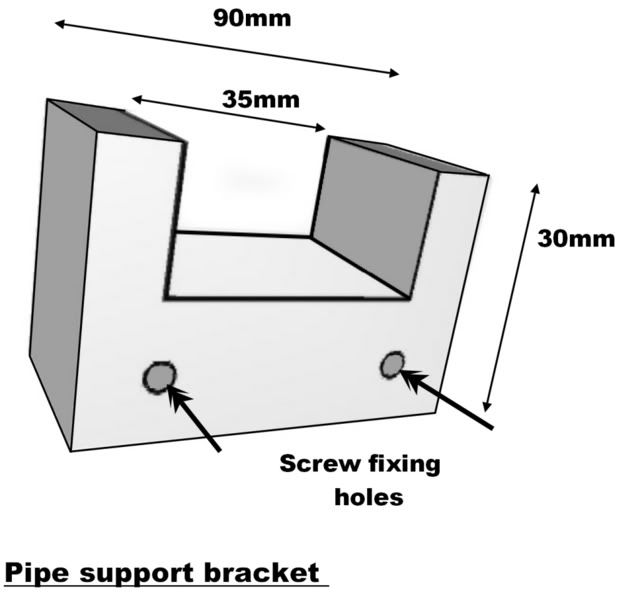
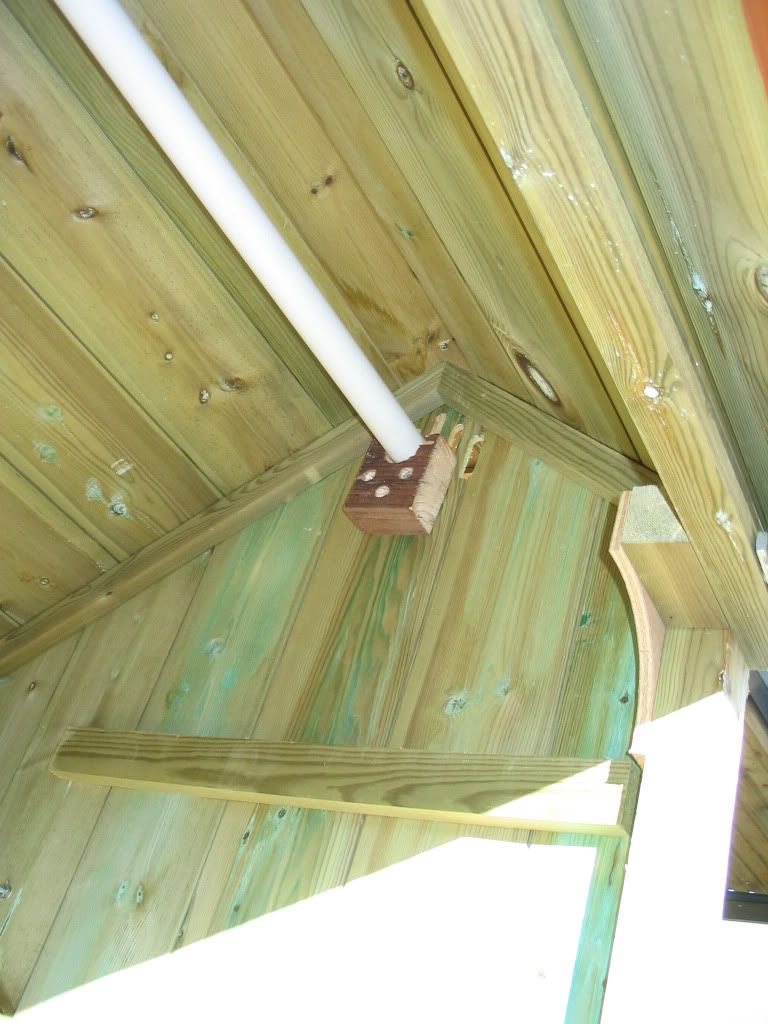
tube support
 Attaching the cord to the Antenna
Next attach the cord to the antenna which is best done with the mast slightly extended which you can do as follows. Twist the aerial copper conductors of the positive (12V) and up/down signal wires together . Ensuring the leads from the PSU are separated from one another (use the terminal strip to ensure this if necessary) power up the PSU and touch the aerial (brown or red) positive 12V (and signal) wire to the positive PSU wire and the negative aerial wire OV (black) to the negative PSU wire momentary so the antenna raises 20cms or so. Quickly remove one of the connections when the antenna is raised enough to allow you to get at the top section. The antenna will stay at the length extended when the power is removed.
The best way I found to attach the cord is to use a spring anti-shake (split) washer that is of a diameter which allows the antenna top section to run through it but not the button on top of the mast. Open the washer up by twisting the ends apart using a couple of pairs of pliers (a small mole grip is useful to hold one end securely and use a pair of pliers on the other end). Attach a small split ring the sort you get on key rings through the washer and close up the gap with the pliers. Tie the cord to the split pin and you are ready to fit the bits to the house. Heres a photo of Henrietta the helpful hen showing you what the attached cord looks like.
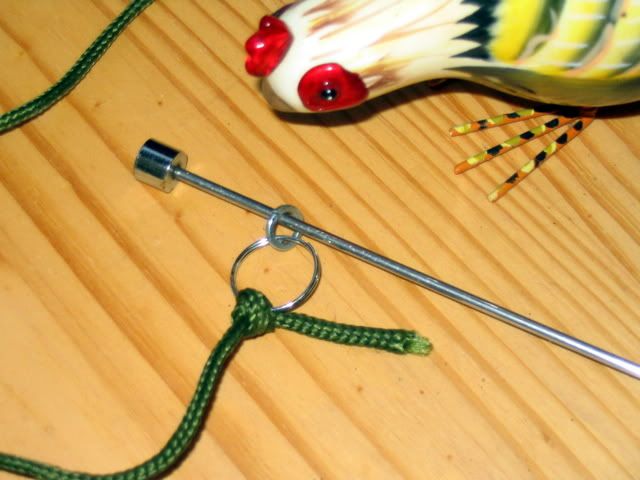
cord connection to antenna
Fitting the Aerial and tube to the houseNow using a flat drill bit, drill a 32mm or similar large hole in the house end walls, big enough to allow the aerial tube with its chrome nut to pass through. The hole needs to be as high up on the eaves as possible to allow maximum door elevation while still allowing enough room to fit the clamp and tube inside the house. Henrietta the helpful hen is showing you the correct position to drill the holes in the photos below. The holes need to be in the same position on the front and rear walls so they are aligned as the tubing will connect them.
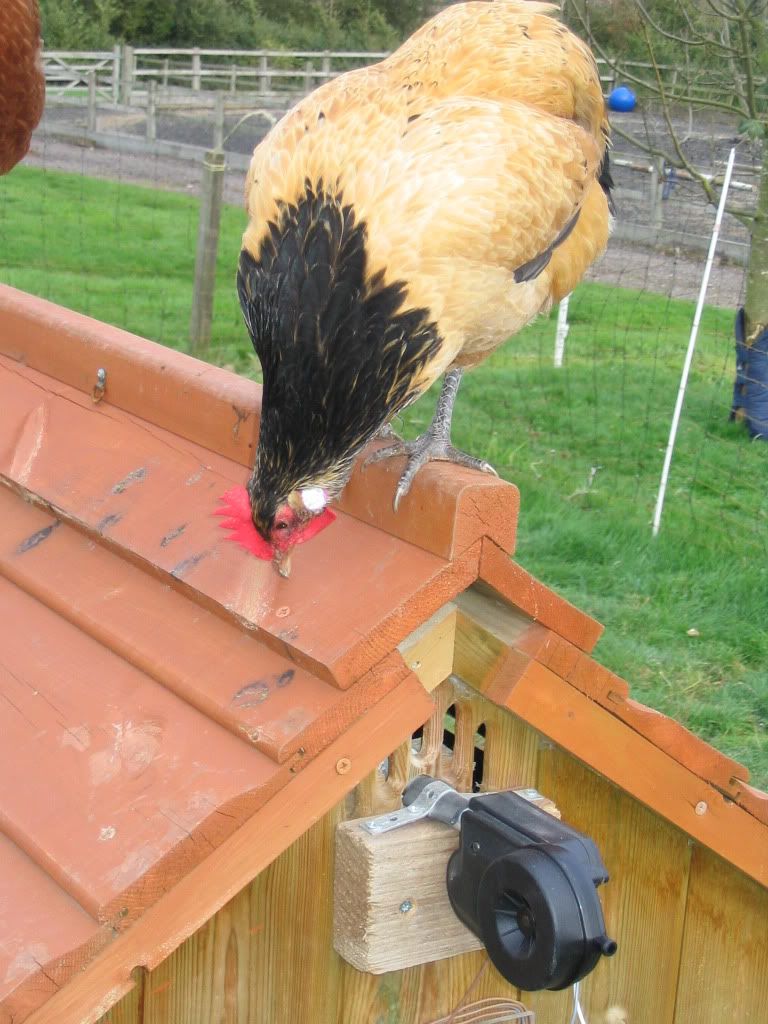
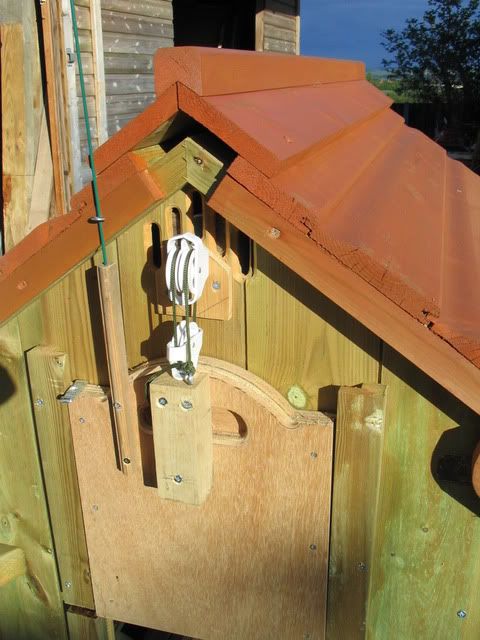
Next measure accurately the distance between the holes under the eaves and allowing 4mm or so for clearance cut the tubing to this length. Now fix the two tubing support brackets in place inside the house underneath the holes using a couple of wood screws of suitable length, so that when the tubing is placed on the brackets the holes are roughly central on the inner bore of the tube. Fit the tube in place.
Fit the lower part of the clamp on the outside rear wall of the house using longer screws which will extend through the wall and bite into the bracket support for added strength. Again ensure that this is positioned so that when the aerial is fitted the antenna runs centrally through the tube.
We are now ready to thread the cord and fit the aerial clamp. Using a thin garden cane insert it through the front of the house through the tube so it protrudes through the back wall. Using sellotape or similar, tape the end of the pull cord to the cane and pull it through the tube out the front. A second pair of hands are now useful to feed the aerial into the tube at the rear while the cord is pulled through the front. Insert the aerial as far as it will go so that the clamp can be fitted around the tube. Fit the upper part of the clamp and tighten down the screws but not too much that the tube is deformed (use the rubber to protect it). If you have difficulty engaging the clamp screws because of the roof overhang unscrew the lower part of the clamp and fix to the aerial tube first and then screw it back on the rear wall.
Fitting the door pulleysWe can now fit the front pophole door pulleys and attach the cord to the door.
Its important to ensure that there is enough clearance between the pulleys to allow a lift which gives an opening of 250 to 300mm or so for the chickens to enter and leave easily. This is why you need to mount the tube as high under the eaves as practical. You can position the bottom pulley part way down the door so that it doesnt constrain this distance too much. If the aerial has more extention than is needed thats ok as long as it doesnt protrude through the front of the house. Excess movement can be taken up by allowing the cord to go slack at the full extension of the antenna. Its important that that the top and bottom pulley are vertically aligned to give a nice straight pull and fall to prevent the door jamming. Chocking the house legs with wedges so the door is reasonably level and the pophole vertical maybe necessary if on unlevel ground like my houses are. You should make your pulley mounting blocks of suitable dimensions so the top pulley is spaced off the house wall and directly vertically above the bottom pulley see the diagrams and photos.
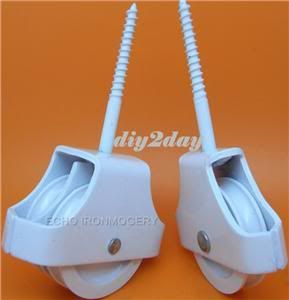
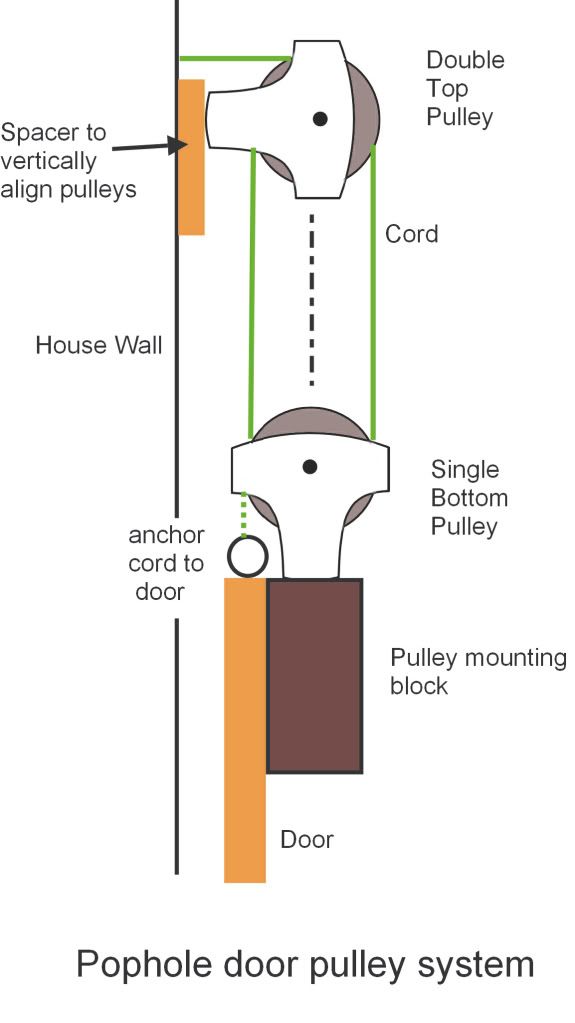
Mount the double pulley on the house above the single pulley which is mounted on the door.
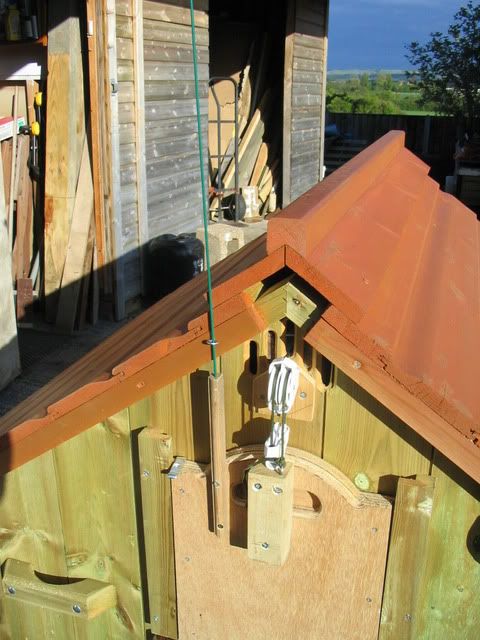
Thread the cord so it passes over the left side top pulley wheel and passes down the front of the lower pulley and the goes under the lower pulley wheel and returns up the back to the right hand side upper pulley wheel. Over this wheel to the front and down to the door where it is tied to an eyelet ring screwed into the door besides the lower pulley . see photos and diagram.
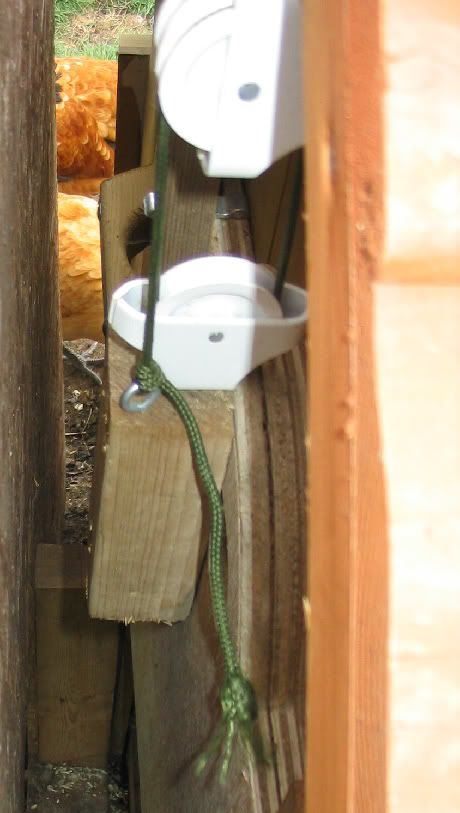
Dont worry about adjusting the cord length well do that once were completed the wiring as a last task when we test the set up.
In the next post well cover completing the wiring and testing.
Best wishes
HF